Technology 3 - Lecture/Tutorial
Wednesday, September 5, 2012
Blending Assignment
Thursday, May 31, 2012
Printer Calibration
Types Of Paper Used;
Photo Paper Plus Satin
Photo Paper Plus Glossy II
Through out this process I had a few difficulties with one of the printers as it would print as it kept saying there was no paper loaded (when there was), which was strange. After swapping everything seemed to run perfectly which was a relief. I was unaware/forgot that at the time that we had to swap computers to scan the color chart (as only two computers in the room only had the other version of the eye1 calibration application). A few hours later I ended up with me final result of the prints being correctly calibrated. Though my prints compared to the mater prints (them being Brians) had a silghtly browny color to it, this said the prints had full tonal ranges in the charts (pictured above). I am quite pleased with the final product, where I compared that the before and after look completely change.
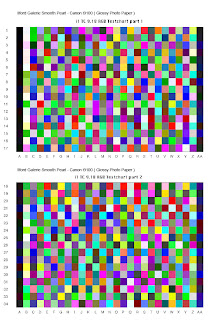 Color Chart (used to scan into the computer and calibrate the printer)
Tuesday, May 29, 2012
Calibrating A Computer Screen 3
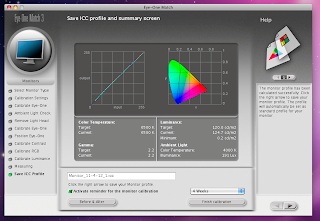
Color Temperature;
Target; native
Current; 6200
Gamma;
Target; 2
Current;2
Luminance;
Target; 120.0 cd/m2
Current; 136.2 cd/m2
Minimum; 0.1 cd/m2
Ambient Light;
Color Temperature; 7200 k
Illuminance; 46 Lux
As you can see the goal was to achieve the closest result to the target, which was achieved (apart from the luminance which is a bit off).
Tuesday, May 8, 2012
Ageing A Photograph
Notes
As mentioned in my step by step process, I didn't mention on the actual presentation is that when you begin each process you need to create a new layer for each step. This is so you can go back and alter particular processes with out affecting the other steps.
Tuesday, May 1, 2012
HDR
Single Shot
(What it would have looked like without the use of the HDR)
For my HDR (High Dynamic Range) shot I originally wanted to photography the jetty on a lake which was down the coast. Though due to weather difficulties I wasn't able to complete. This said I photographed this building located on the highway behind CIT, at sunrise. A collection of roughly 25 images were used to gather the blow out and the darkness of the images to obtain more detail. I am quite happy with the result as I have the detail within the shadows whilst maintaining detail in the bright barts of the image.
Tuesday, April 10, 2012
Colour Management - Research Questions
Device Profile; Manages the colour gamut of screens, printers, scanners & cameras.
Working Space; A colour gamut not specific to any device like adobe RGB, sRGB, and pro photo. These are specific to the confines of colour and are sourced from larger gamuts known as colour space
5. What is a 'reference colour space' and how are they used?
Reference colour space is a device independent based on colour space. Most current CMSs use a CIE-defined color space, such as CIE Lab or CIE XYZ. You never have to work directly with the reference color space; it's the theory behind how the software works. Think of it as the common ground for all color devices—a space that can represent any colour.
6. What is the difference between 'calibrating' and 'profiling' ?
Its the manual adjustments you have to make i.e. adjusting contract, brightness on the devices. A profile provides information made by the calibration process for each device that is used.
7. What is rendering intent?
rendering intent determines how a color management system handles color conversion from one color space to another.
8. Which rendering intents are most useful to photographers, and when would you use each of them?
Photographers always use relative or perceptual intent, as for everyday images, absolute causes colour cast whilst saturation produces unnatural colors. Relative intent handles out-of-gamut by burning these colors to the edge of the gamut, leaving in-gamut colors unchanged, while perceptual intent smoothly moves out-of-gamut colors into gamut, preserving gradations, but distorts in-gamut colors in the process. If an entire image is in-gamut, relative is perfect, but when there are out of gamut colors, which is more preferable depends on a case-by-case basis.
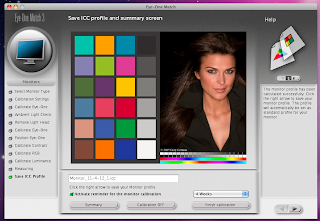
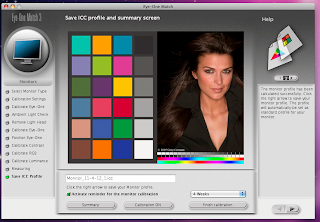
Calibrating & Profiling A Monitor 2
